BLOGGER TEMPLATES AND TWITTER BACKGROUNDS »

Friday, August 6, 2010

The Past, The Present and Future of my Hairstyle(s)

Pardon me while I blog about non-food/cupcake related stuff for a hot minute :) After reading Ali's and Vicki's evolution of hair, I decided to take a trip down memory lane and looked through myspace/flickr/facebook pictures. Let's start with my teen years, before I had full control of what I can and can't do to my own hair.

1996-2000:
1996 was the year I got out of the convent after living there for about 2 years. Prior to living there my mother didn't really let me grow my hair out but since she wasn't around to tell me what to do, I let it grow out. The year 2000 my hair was cut super short due to my mother's bright idea of perming my hair. I will not be posting a picture of that but you can see how short I had to cut it to get rid of the perm. It's ok though since I joined the U.S. Navy right after I graduated high school.


1996: God I was so skinny!


Right before I moved to the U.S.


Senior Portrait


We're going to skip a few years since from 2001 till 2004 my life, to include my hair was just not very...pleasant or really that note worthy. So let's jump onto 2005 shall we?


This was the height of my "party days" and I decided to be bold and go pink! It also glowed in the blacklight ;)


2006: I went from the bright pink streaks to light golden/copper color and then to red. Red is the hardest color to maintain!


Light Golden/Copper


Red streaks!


2007: My hair kinda changed color from dark to light. By this time I was hooked on layers...for some reason I just can't grow my hair out past my shoulder...to this day I'm still trying.


2008: I had my wonderful son that year. Which also meant I didn't have very much time or money to spend on a new hairstyle. I started working 4 months after I had my son. (around October)


2009-2010: This is the year I moved to where I live now. Tampa Bay area (to keep it simple) and have met my wonderful hairstylist (and friend) I feel like I haven't varied much haircut wise but I have played around with color some. I'm hoping to try and grow my hair out again but I just get so impatient. My hair is fine but I have a lot of it, it also doesn't like to stay curly and I don't particularly like "poofy" hair or a whole lot of "body" as others might call it. For summer 2010 I wanted to do pink again...this time a lil less streaky. It's faded out now though and I'm not sure what I'm going to do next...any ideas?


The End! Well, for now. Give me another month or two for a new style or color :D

Can a cupcake be sexy?

Some of you might know that this year I celebrated my birthday with my toddler. Our birthdays are only a week apart and since the venue where I wanted to have his birthday party at was only available on my birthday weekend...well I'm sure you see where I'm going. Anyway, my birthday weekend was full of baking craziness! I had to bake a batch of cupcakes for my son's birthday, my friend, Lauren's engagement party (which was later that same day of the party) and of course MY birthday cupcakes. I wanted to make something special for me...although, I wasn't too sure what. It kinda just happened. (that's what he said! lol) I honestly, don't remember how my thought process happen upon this concoction. I was as per usual using Hershey's "Perfectly Chocolate" chocolate cake and next thing i know i was on a quest for something... and Chocolate Caramel Seduction was born! The name just happened like today. It was nameless, and had been since it's creation back in may. I re-made these cuppies for a friend of mine's going away shindig and there was a collective "OMG" "goddamn" response on how awesome it was. I also made another batch for my classmates in my last portfolio review class. Honestly, out of all the cupcakes I've made, this is by far my favorite out of all of them. I'm sure you want the recipe right???


here it goes!

Chocolate Caramel Seduction

for the cake: I used Hershey's "Perfectly Chocolate" chocolate cake or you can use your favorite chocolate cake recipe. I used dark cocoa powder on mine (it's my favorite :)) I would also recommend not over filling your cups so you can easily drench it with the tres leches and it not spill over.

Tres Leches
1 cup heavy whipping cream
1 can condensed milk
1 cup evaporated milk

*mix together in a bowl. set aside in the fridge till cupcakes are cool.

*After your cupcakes are cool poke holes on em. You can either use a kebab stick or a fork or even a small knife. Just poke a whole bunch of holes all over the top of it so that it can soak up the tres leches.

*after the poking ;) brush the tres leches over the cakes. Repeat this till your cake is soaking in milk (but not falling apart)it should feel a little heavier than normal. refrigerate it if you're not gonna frost it right away and eat it since it has milk.

Chocolate Ganache
1 package of Ghirardelli Bitter-sweet chocolate chips
1/4 cup heavy whipping cream

*on a double-broiler (in my case a glass bowl over a pot of simmering water) pour chocolate chips and cream and stir till melted and mixed well. If it's too grainy/thick, add more cream 1 Tbsp. at a time. It should be in a creamy, spreadable consistency.

*let it stand for about 5 minutes. Then spread over the tops of your tres leches soaked cupcakes.

Caramel Drizzle
1 cup sugar (just regular white granulated sugar)
6 Tbsp. butter
1/2 cup heavy whipping cream

**Before you start making the caramel make sure you have all the ingredients! You don't want to burn your sugar trying to scramble to get your ingredients.**

*Use a heavy, non-stick pan. on high heat pour the sugar on the pan stirring constantly till it melts and looks like molten glass. when sugar is completely melted lower the heat to medium and add the butter. It will bubble a lot so make sure you use a big enough pan as to avoid spillage. Stir and make sure it's mixed together.

*Count to 5. then take it off the heat and slowly add the cream while stirring. The caramel will be runny but it will thicken as it cools.

*Put caramel in another bowl and let cool. You want this to be cool before drizzling over your cupcakes or it will melt the frosting.

Swiss Meringue Buttercream

**Depends on if you want vanilla or coffee flavored frosting, substitution is easy :)**

1 1/4 cup sugar
4 egg whites
1 cup unsalted butter (room temp)
1 1/2 tsp. of Vanilla
or
1 Tbsp.instant coffee mixed in 1 1/2 tsp of hot water

*On a double boiler: place sugar and egg whites. mixed till sugar is melted about 7-10 minutes.

*pour sugar mixture onto your mixer with the whisk attachment and whisk on high till it's cool but not forming stiff peaks.

*switch to paddle attachement. Add butter 2 Tbsp. at a time mixing it well on low/medium speed.Mixture will be runny. When you've added all the butter, start mixing on high till the frosting starts to make that slapping sound. Scrape sides and add vanilla or coffee.

*Pipe frosting over your ganached cuppies and then drizzle with however much caramel you want. ENJOY!!!


Chocolate Caramel Seduction

Here are some folks enjoying said cupcake :)


Wednesday, July 14, 2010

Cake Pops and Truffles: yummy and pretty

Hello Dear Readers of mine :) Are you guys still out there? **is this thing on?** As I have mentioned in previous posts, I will have a few guest bloggers since my schedule (aka life) is a bit ridiculous and I figured that I can call onto my fellow bloggers/fabulous girl friends to help me. I'd say boy friends but um...no guy has really volunteered, if you're out there dude, just shoot me an email and you can guest blog...it doesn't even have to be food related it can be anything "pretty" and that I believe is a broad enough topic...amirite?

You might ask who my guest blogger is today, well, her name is Sarah :) She's fabulous and I love her. I first met her thru twitter via her announcing that she has books to give away, for FREE! She even paid for the postage! So after a few days I received my awesome books (yes i said books, there were 4 or 5 I believe) and from there on out our virtual friendship began. Honestly, if she didn't live on the opposite side of the country I would love to be hanging out with her, but alas CA is kinda far from FL :( Let me just say that I have tasted her cake balls (hehehehe i said balls :P) She sent me some samples and it was DEE-LISH! No, really it was pretty freaking awesome. You can follow her tweets @sarahntastic and check out her blog She's quite sassy and I'm sure you will enjoy tweeting with her and reading her rants and raves just as much as I do. Okay, I'm going to shut-up now and let you read on and enjoy! (Thanks again, Sarah!)

---------------------------------------------------------------------------------------


Just like @colorMEcupck, I am a cupcake lover. I make them, I eat them, I review them, and sometimes I sell them. In looking for more fun things to create, I came across this Bakerella post, and clicked through to these step-by-step instructions for cake balls.

Overall the process is mostly easy, but extremely time consuming, especially if you're me and accept a first order of 100 pops! Instead of reviewing the process I've already linked to, I will list tips that make your cake pops easier to complete.

1. The texture and moisture should be more dry than you might think initially. Remember you will be expecting the cake to hold a stick as well as hold up to chocolate and candy coating dipping. I found that too much frosting means the cake is too wet and will not allow the stick to stay stuck! **always refrigerate pops after you make the balls, and again after you insert the sticks. They must be chilled in order to hold up to dipping!

2. The size of the ball should be fairly small, like a jacks bouncy ball, NOT a golf ball. Remember, again, you will be dipping these, so the size will increase, but you also need to keep the stick in place while you are dipping in hot candy.

3. I found it easiest to refrigerate for 5 minutes then put the tray in the freezer for 10 minutes, then back to refrigerator for final chilling before wrapping or serving.

4. Don't worry about tiny candy swirls, holes, or messiness. You can easily add drizzles and sprinkles to cover this, plus this makes them all the more pretty.

5. You will need sheet pans, waxed paper, sticks, and although some may say this is a waste, I absolutely need my Wilton chocolate/candy melts warmer. I purchased mine at Michael's using the weekly 40% off coupon, so it was fairly inexpensive. Microwaving burns real chocolate, which is expensive and not worth the waste.

6. Candy melts are much easier to use when melted than chocolate, but some recipes just taste better with real chocolate, like my chocolate raspberry cake pop!

7. Use box cakes and add-in flavor. Don't waste your flour, sugar, butter on these. The flavor of the cake isn't the primary thing here, it's the entire package, so a cake mix with tasty flavored frosting and add-ins like nuts, extracts, chocolate chips, butterscotch chips, mint chips (my grasshopper was a huge hit), dried fruit is a better way to spend your money.

8. While these are time consuming, they are a huge hit. Remember one batch of cake makes dozens. Divide the batter and make several flavors. People love them.

Here are pics of my process & my favorite final cake pops!

Balls are formed, sticks inserted, dipping has begun!


This is a must have tool for me! Wilton melting pot.

Dipped, ready to refrigerate before drizzling!

Chilled after dipping, ready for decorating!

Drizzling is super easy! use a spoon or spatula & flick it over the dipped pops!

Contrasting drizzles!


Purple candy melts for easter, almonds for fun (marzipan cake)

Grasshoppers! Chocolate cake with mint chips, mint extract, chocolate dipped

Inexpensive cello bags from the Target $1 bins!


Thursday, July 1, 2010

Monkey taste, monkey eat!

Before I say (type) anything else, let me apologize for not having a picture of the recipe I am about to post. It was eaten too quickly and I just got side-tracked that I forgot to take a picture. It will be remade again soon as I have some over-riped bananas again so don't fret :)

I know I haven't posted cupcake stuff but hang with me ok? This delicious "bread" can be paired with coffee or as dessert or your entire meal. I promise I won't judge. We all have had over-ripened bananas and it's so wasteful to just throw em out. This is a good alternative to that...or you can just buy bananas and purposely forget to eat it till it gets all black, that's fine too!

I'm a bit short on time so I won't say too much of an intro. The original recipe I adapted can be found here.

Chocolate Chip Banana Nut Bread

* 1 1/2 cups all purpose flour
* 1 teaspoon baking soda
* 1 teaspoon baking powder
* 1/4 teaspoon salt
* 3/4 cup semisweet chocolate chips (I used a cup of dark chocolate chips instead)
* 3/4 cup walnuts, toasted, chopped (I used 1 cup of chopped walnuts; spread it out in a pan. toast in a pre-heated oven 350 degrees for about 7 mins)
* 1/2 cup (1 stick) unsalted butter, room temperature
* 1 cup sugar
* 2 large eggs
* 1 cup mashed ripe bananas
* 2 tablespoons fresh lemon juice
* 1 1/2 teaspoons vanilla extract (I used 2 teaspoons)

Directions:

Preheat oven to 350°. Stir together flour, baking soda, baking powder, and salt in a medium mixing bowl until blended. Combine chocolate chips and toasted walnuts in a small bowl; toss with 1 tablespoon flour.

Beat butter in large bowl until fluffy. Gradually add sugar, beating until light and fluffy. Beat in eggs one at a time, beating after each addition. Beat in mashed bananas, lemon juice and vanilla extract. Beat in flour mixture on low speed until blended. Spoon about one-third of the batter into buttered and floured 9x5x3-inch loaf pan. Sprinkle with half of chocolate chip-walnut mixture. Spoon another one-third of batter over the chocolate chip mixture. Sprinkle with remaining chocolate chip-walnut mixture. Cover with remaining banana bread batter. Run knife through batter in zig-zag pattern.

Bake bread until tester inserted into center comes out clean, about 60 to 70 minutes. Cool for 5 minutes in the pan; turn out onto rack to cool completely.

Makes one 9x5x3-inch loaf of banana bread with chocolate chips and walnuts.

***Note before you start baking***

When you mix the chocolate chips and walnuts with the flour, I also tossed in about 1 1/2 to 2 teaspoons of cinnamon. You don't have to do it if you don't like cinnamon but I love cinnamon and I think it gives the bread just a little bit of extra yum factor :) Happy Baking!

Friday, June 11, 2010

Chocolate/Peanut Butter Birthday Spectacular!

**Hello Fabulous readers of this here blog :) As previously tweeted, I said that I will have some guest bloggers since my schedule as a single-mom, student, worker etc. has been quite demanding as of late. So, instead of just being silent and absent, I've decided to call to arms other bloggers who are equally (if not more) fabulous than me and love cupcakes, food and pretty lil things just like me!

Crowning Victoria is a friend of mine (by proxy to one of my RL (real life) friend, Alicia)
She's a wedding blogger and quite the electric slide dancer (if I may so add) Without further ado, I present, Crowning Victoria!


-------------------------------------


I am thrilled to be guest blogging for color*ME*cupcake for numerous reasons, namely cupcakes.
I really don't do recipes on my blog, and that's just 'cuz I hate upkeep (the same reason I don't do highlights).  This opportunity to share one of my rare cupcake successes (some might argue "fail") highlights my MONTH, never-mind week.
Shameless plug: Visit my wedding planning/ego boosting blog called Crowning Victoria.

In the recent past I baked an awesome batch of chocolate cupcakes with peanut butter centers for my fiancee's birthday.  It should be noted that on my list of most disliked flavor combos is PB and Choc.  I just CAN NOT do it.  The sweet and salty overwhelms me, which is what draws in most people.  My fiancee is most people; he loves anything with peanut butter and chocolate.


So naturally I made Good Housekeeping's recipe for Chocolate-Peanut Butter Cupcakes, because I honestly do trust anything with the Good Housekeeping seal of approval (even choc-PB things).   It just seems right.
One of the reasons I heart this recipe is because the ingredients are simple.  There was no need to run out and purchase last minute items to make it all happen.  However, it's not the timeliest recipe, so if you're not in-it-to-win-it, then start earlier so you can win it.
But here's my downfall when it comes to baking: attention to detail.  I sorta flake on that, a lot, especially if I'm drinking wine.  One would think I might put the bottle aside, but baking and wino-ing are just inseparable in my mind.  Just don't add baking powder instead of baking soda.  Pay attention, now.

Recipe!
Filling and Cupcakes:
  • 2/3 cup confectioners' sugar
  • 1/2 cup creamy peanut butter
  • 10 tablespoon (1 1/4 sticks) butter or margarine, softened
  • 1 1/4 teaspoon vanilla extract
  • 1 2/3 cup all-purpose flour
  • 3/4 cup unsweetened cocoa
  • 1 teaspoon baking soda
  • 1/2 teaspoon salt
  • 1 cup sour cream
  • 2 tablespoon milk
  • 1 1/2 cup granulated sugar
  • 2 large eggs 
Preheat oven to 350 degrees F. Line 24 (more or less) standard muffin-pan cups with paper liners.

Make the Filling: Mix confectioners' sugar, peanut butter, 2 tablespoons butter, and 1/4 teaspoon vanilla until blended. This is hard without a Kitchen-Aide or fancypants blender.  Be patient, it will come together with a hand-held electric blender.
The recipe calls for 24 balls created by "heaping teaspoons."  I call shenanigans.
Dampen your hands first (or lightly apply olive oil to reduce stickiness).  Take quarter to nickle sized dollops into your hands and make something spherical.
Place balls on greased aluminum foil or a waxed paper-lined cookie sheet; set aside IN FRIDGE. 

Cupcakes: 
1.  The recipe calls for combining flour, cocoa, baking soda, and 1/2 teaspoon salt on waxed paper. Shenanigans. Put 'em in a bowl, it works just fine.
2.  In a GIANT (2-cup) liquid measuring cup, mix sour cream, milk, and remaining vanilla; set aside (don't loose it)
3.  In large bowl, beat granulated sugar and remaining 8 tablespoons butter just until blended (heart attack, maybe). 
4.  After a good mixin' add eggs, 1 at a time, beating well (like a naughty child) after each addition. 
5.  Beat 1 to 2 minutes more or until light and fluffy (unlike a naughty child)
6.  Add flour mixture alternately with sour cream mixture, beginning and ending with flour mixture. Beat just until ingredients are combined, occasionally scraping bowl with rubber spatula. 
However, I just mixed the bejesus out of everything.  


Getting Jiggy With It:

1.  Spoon 1 (to 1 1/2) heaping measuring tablespoon batter into each muffin-pan cup.  SERIOUSLY, you want more on the bottom so the PB balls in the middle don't dry out.


2.  Drop 1 peanut butter ball of yumminess in center of each cup and top with another mound of batter. 

3.  The recipe calls to bake cupcakes 25 to 28 minutes or until toothpick inserted in cupcake comes out clean.  Mine were done in 20 minutes flat.

Immediately remove cupcakes from pans and cool completely on wire rack


For Butter Frosting: 
  • 3 cups confectioners' sugar
  • 6 tablespoons butter (no substitutions), softened
  • 1 teaspoon vanilla extract
  • 3 tablespoons (or more, as needed) milk
 When cupcakes are cool, prepare Butter Frosting: In large bowl, with mixer on medium-low speed, beat confectioners' sugar, butter, vanilla, and 3 tablespoons milk until smooth and blended. Beat in additional milk as needed for easy spreading consistency. Increase speed to medium-high; beat until light and fluffy, scraping bowl often with rubber spatula. Makes 1 1/2 cups frosting. Spread frosting on cupcakes. 
(I used store bought frosting because I was in-it-to-kind-of-win-it)

TA-DA!


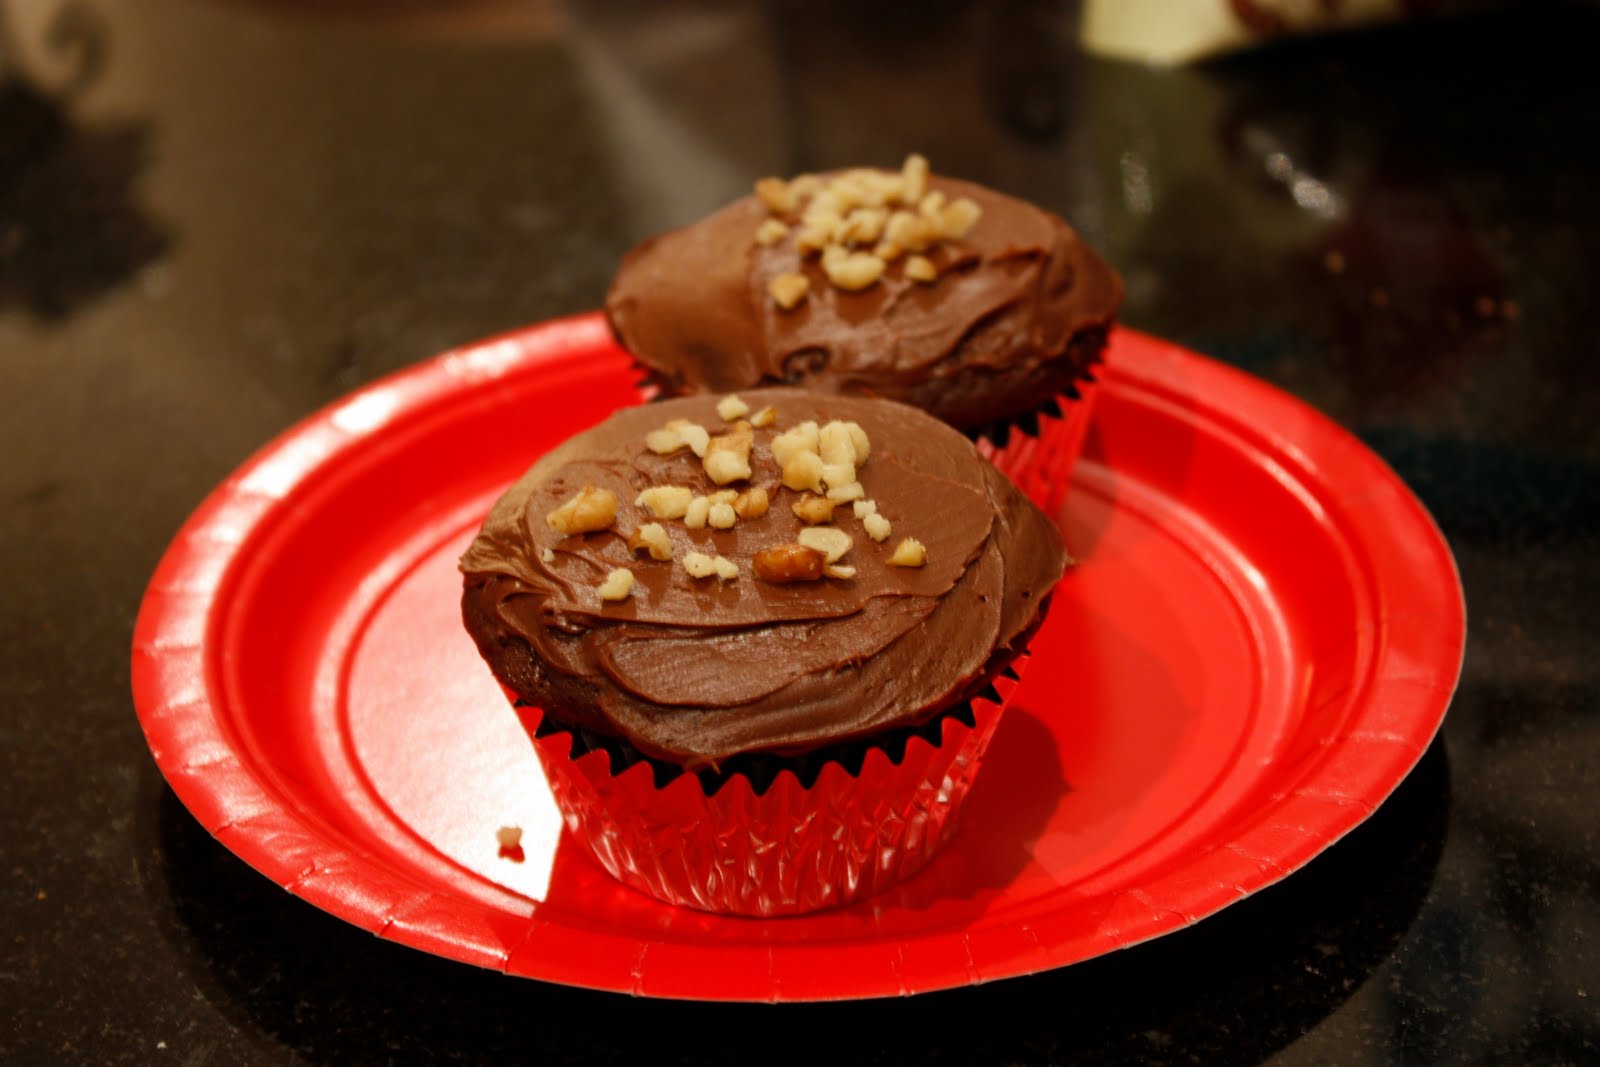
(Like I said, attention to detail when baking is NOT my forte, and yet a necessity when baking.  That is why only 2 cupcakes are frosted and decorated!)


Thanks this guest post, chica!
Don't forget to visit my non-cupcakes blog!

    Thursday, May 27, 2010

    Love is Pretty

    Don't have a conniption! I am totally making two (TWO) post in one week! Don't get too spoiled either ;) This entry has nothing to do with food or accesories or clothes or shoes. It has a lot to do with love and I think love is pretty. Yea, I'm a sap. I cry at movies (and books) that's just the kind of woman I am and I'm ok with that.

    Yesterday, despite how crazy my schedule is this week I managed to squeeze in an engagement photoshoot with my ex co-worker turned awesome bff, Lauren and her equally awesome fiance, Bryant. They actually got engaged a few months back and I told her then that I wanted to do a photoshoot with them...as a gift :) Schedules and life makes it hard to just get up and do a photoshoot and I was glad we finally got to do it yesterday. I had originally wanted to do it at Florida Botanical Gardens but the couples' schedule and mine wouldn't make it before they closed. We decided to do it at their house first (which didn't work well as there were too many shadows)but then we headed out over to Howard Beach Park to get some sunset-y pictures...WIN! Despite that it was windy, and the light was ever changing, I've to say I captured some pretty nice moments. I've never been the "director" kind of photographer. I like to capture candid moments...real moments *not* moments made to look real. I would like to think that I was able to capture the love that was emanating from Lauren & Bryant. I would love to one day have that kind of love. The future husband and wife loved the pictures (and so does their family) and that's what matters :)


    Here are some of my favorite shots:


    P.S.If you want to see the rest of the Fleck-Haney Engagement Photos go here.

    P.P.S. I forgot to mention that Lauren asked me this week to be one of her bridesmaids :D Of course, I said yes!

    Wednesday, May 26, 2010

    I swear I'm not dead...yet!

    Hello? Is there anyone still out there? I know I have been MIA and I do apologize. I've had this freakin awesome ideas for blog entries but life keeps interrupting my blogging! There are a lot of things going on this weekend. First of all it's my 28th birthday (if anyone wants to buy me gift(s) feel free! ;)) Second, we're celebrating my son's 2nd (yes, SECOND as in 2!) birthday on my birthday, May 30th. Third, later that afternoon is one of my good friend's engagement party! I am booked solid this weekend and not to mention schoolwork that needs to be done.

    This lil guy is turning 2!!! I know I can't believe it either!


    I am planning on making a mini beach themed cake for Jordan (my son) and letting the kids decorate their own cupcakes. I'm also making grown-up cupcakes for me and my adult guest and another batch (or 2 or 3) of engagement cupcakes for my friend, Lauren. Super stoked but it's a helluva lot of work! I promise to post pictures when I get em done...and a recipe or 2 :)

    Sooo..what do I have for you guys today, you might ask? Well...since you guys have been so patient, i sposed I could give you a little cupcake ;) Last April, I had a house-warming party and it wouldn't be a party without cupcakes! The date of this party also fell on my friend, Derrick's birthday so I asked him what kind of cupcakes he would like. He said LEMON! Mind you, I'm a chocolate girl through and through so a lemon-y cake is not something I would've chosen but hey, I aim to please ;) Then the search began... 1 Google, 2 Google, 3 Google CLICK!

    I found Brown-Eyed Baker's Lemon Limoncello Cupcakes Her pictures made my mouth water! I didn't have the time to make my own limoncello and I wasn't about to spend money that I didn't really have to make some limoncello so I used lemon-flavored vodka mixed with corn syrup and a some lemon extract for extra lemon-y flavor.

    Lemon-Limoncello Cupcakes

    Yield: 1 dozen

    For the cupcakes:
    1½ cups all-purpose flour
    1 teaspoon baking powder
    ½ teaspoon salt
    2 ounces (½ stick) unsalted butter, at room temperature
    2 ounces cream cheese, at room temperature
    1 cup granulated sugar
    3 large eggs
    2 tablespoons limoncello
    ½ cup buttermilk
    ¼ cup lemon juice
    Zest of one lemon

    For the lemon curd:
    Zest of 2 lemons
    ½ cup lemon juice
    ¼ cup granulated sugar
    1 egg + 1 egg yolk

    For the cream cheese limoncello frosting:
    2 ounces (½ stick) unsalted butter, at room temperature
    4 ounces cream cheese, at room temperature
    1 tablespoon limoncello
    2 cups powdered sugar, sifted

    1. Prepare the cupcakes. Preheat the oven to 350 degrees F and position a rack in the center. In a medium bowl, combine the flour, baking powder and salt; set aside. In the bowl of an electric mixer fitted with a paddle attachment, beat the butter, cream cheese and sugar on medium speed until light and creamy, 2-3 minutes. Add the eggs, one at a time, beating well after each addition. Add the limoncello and beat an additional minute. On low speed, add flour mixture and buttermilk alternatively, beginning and ending with the flour mixture. Add the lemon juice and zest and mix on low speed just until incorporated. Divide the batter between 12 muffin tins. Bake for 20 minutes or until a toothpick inserted near the middle comes out clean. Let cool completely.

    2. Prepare the lemon curd. In a heavy medium saucepan, stir together the lemon zest, juice and sugar and bring to a simmer over medium heat. In a small bowl, whisk together the egg and egg yolk. Whisk the lemon mixture into the eggs to temper them. Scrape the mixture back into the saucepan and place over medium heat, whisking constantly until it thickens, about 5 minutes. Remove from the heat, and let cool completely.

    3. Prepare the cream cheese limoncello frosting. In the bowl of an electric mixer fitted with the paddle attachment, beat the butter and cream cheese on medium speed until light and creamy, about 2-3 minutes. Add the limoncello and beat for an additional minute. Reduce the speed to low and gradually add the sifted powdered sugar and beat until fully incorporated and smooth.

    4. Assemble the cupcakes. Cut a hole into each cupcake with the large end of a melon baller or the back end of a large pastry tip. Fill each cavity with the lemon curd. Fill a pastry bag with a star tip (I used Wilton 1M) with the cream cheese limoncello frosting and pipe onto each cupcake. Decorate with lemon and berries, if desired.


    ***I double this recipe and got 2 dozen. Don't forget to double the custard recipe too. I used the cone method in filling the cupcakes. Cut a cone shape through the center of the cupcake and chop of the point part, fill with filling then top the hole with the round part of the cone (sans points) I did use a raspberry to decorate it but then I used melted (then hardened) sugar drizzle.

    How do you make sugar drizzle
    Put a cup of granulated sugar it non-stick pan on medium/low heat. Stir till sugar melts and turn to caramel. Be careful to not burn the sugar, it will not taste good! Line a baking sheet with parchment paper. When sugar is all melted (work quickly) get a spoon and scoop some caramelized sugar and drizzle onto parchment paper. Be creative!